Blogging tips
Mostrando entradas con la etiqueta liquid latex. Mostrar todas las entradas

domingo, 25 de octubre de 2015

Halloween 2015 - Gárgola

Hoy os presento mi última propuesta para esta temporada de Halloween 2015. Se trata de una gárgola. No os voy a mentir, lleva bastante trabajo... desde esculpir cuernos (y orejas si lo queréis más realista) hasta maquillar la cara con aquacolors y maquillaje. En mi caso por falta de tiempo solo pude esculpir cuernos y darles varias capas de látex. Luego los rellené con algodón y maquillé un poquito. Las orejas las compré ya así, solo las tuve que maquillar. 

El maquiíllaje queda así...


Y más abajo os dejo boceto y productos utilizados. Espero que os guste y os de más ideas para este Halloween si os pensáis disfrazar y si no pues que lo disfrutéis igualmente!. Besos xoxo.


Image and video hosting by TinyPic

miércoles, 24 de octubre de 2012

Torn Face for Halloween

Hola!! disculpad el abandono literal del blog pero he estado muy liadilla ultimamente y no he tenido tiempo para nada, ni siquiera para ver vuestros respectivos blogs! a ver si este fin de me pongo al día.

Hello!! I'm so sorry for disappering lately but I have been very busy and I haven't had time for anything. 

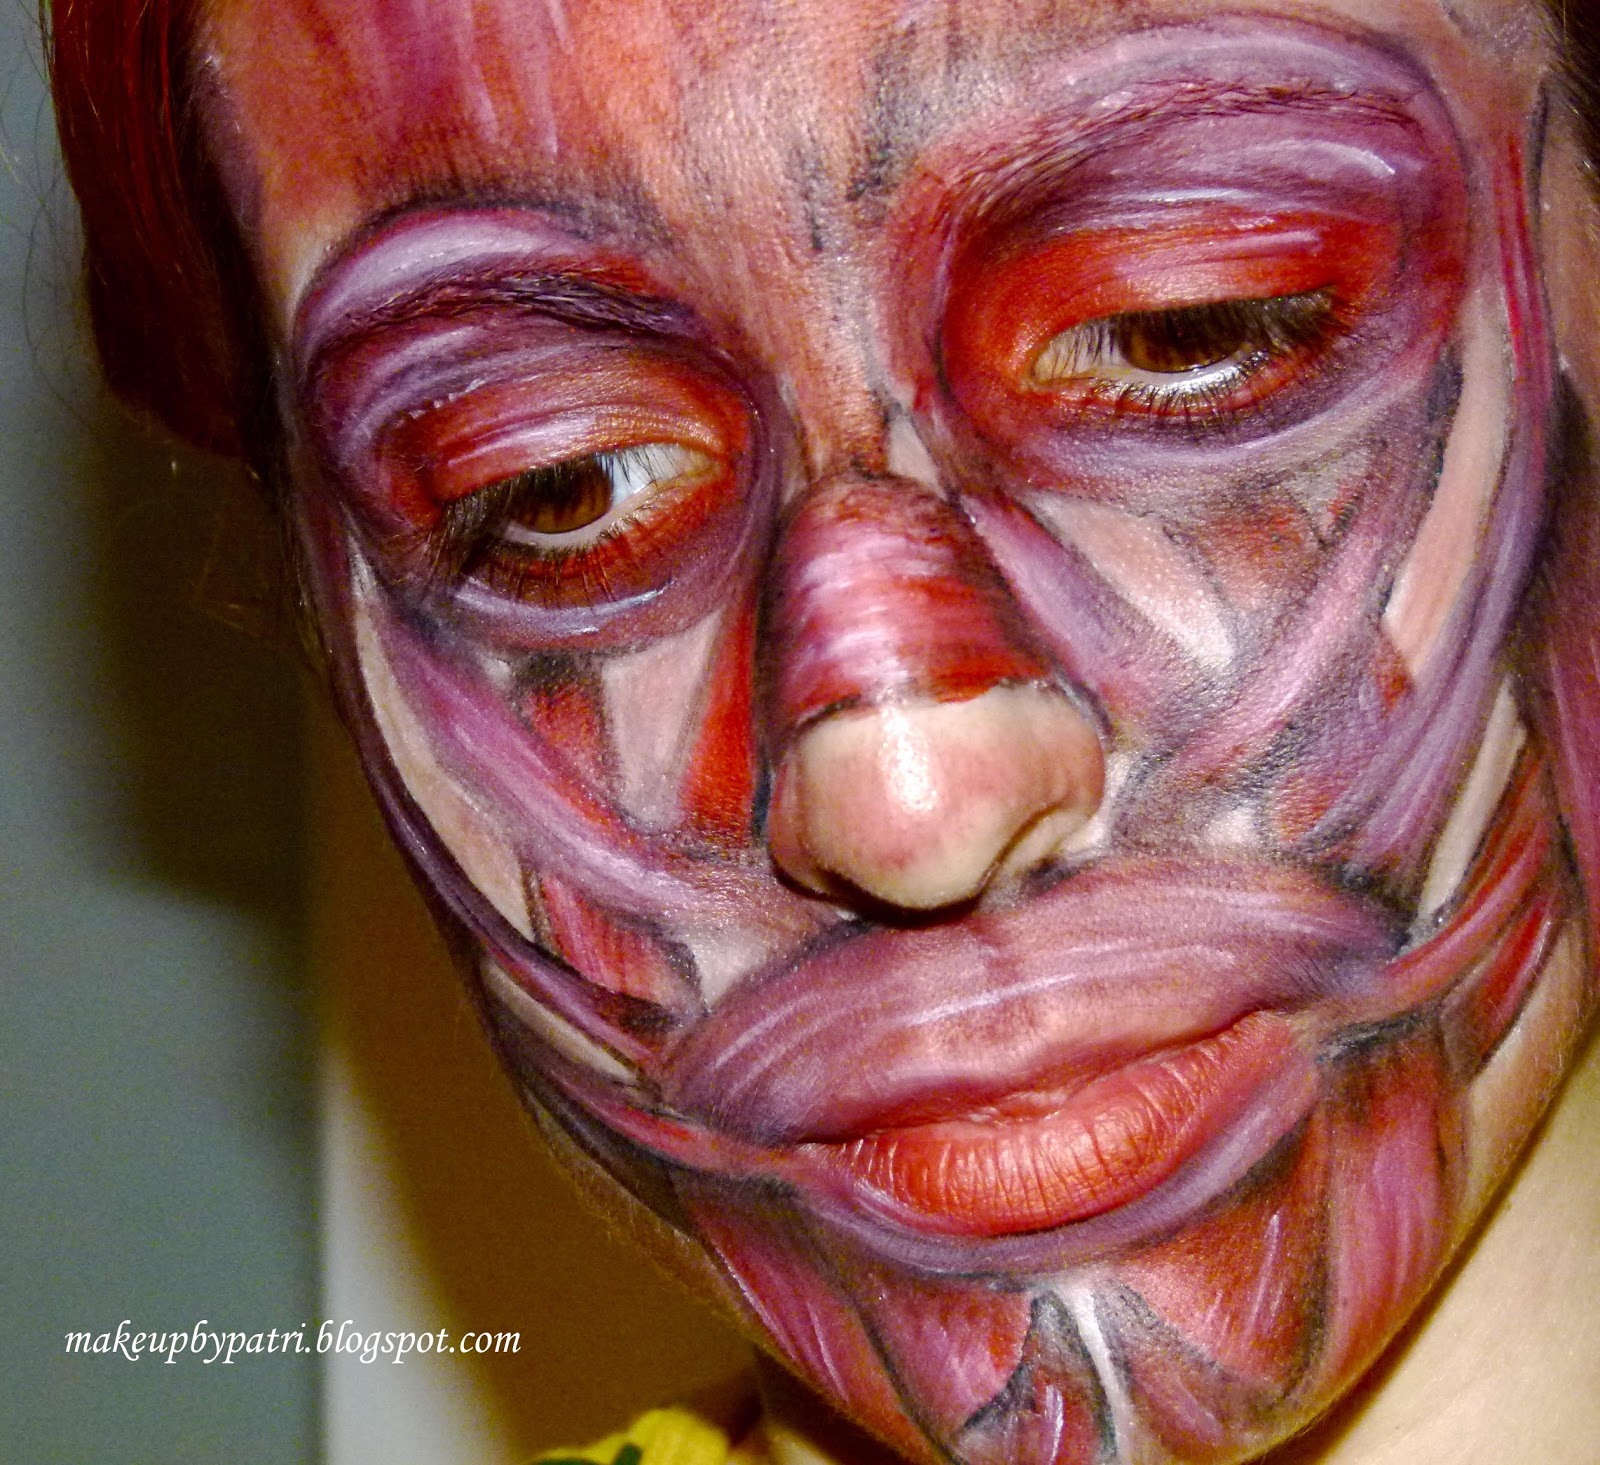
 Bueno como os dije tenía dos looks preparados para Halloween, uno era el de la bruja que ya vísteis y el segundo es de lo que trata esta breve entrada. Este look aviso que es más gore que otra cosa pero aún así espero que os guste. Se trata de una mezcla de técnicas, por un lado hice face painting con los aquacolors de Kryolan y una vez hecho este paso pasé a los efectos utilizando látex liquido y papel higiénico, aunque lo quería hacer con carne artificial para que se quedara mucho más realista pero no tenía suficiente y lo tuve que hacer con látex. Bueno, os pongo priero fotos del facepainting que como véis se trata de los músculos de la cara...

I told you I had two looks for Halloween, the first one was the witch that I uploaded on the last post and the second one is the one I'm posting here today. I tell you this look is more gore than anything else but I hope you like it anyway. Its a mix of two techniques. Fisrt of all I did the face painting that as you will see its the muscles of the face and after that I applied the special effects made with liquid latex, paper and fake blood. I really wanted to do it with wax but I realised I didn't have enough so I had to do it with the latex. Anyway, here are the photos of the facepainting....


Y estas son el resultado con el látex y la sangre y todo...

And these are the result with the latex and the fake blood... 


Y esto ha sido todo, Gore verdad?? Os váis a disfrazar vosotros por Halloween?? de qué os gustaría disfrazaros???? Un beso y nos vemos pronto!

And that was everything for this post. It is very gore, isn't it? Are you going to dress up for halloween??  I hope you tell me about your dresses. Big kiss and take care!

viernes, 12 de octubre de 2012

Witch Look for Halloween

Hola a todos! Halloween se acerca así que hoy os presento una de mis propuestas! Por desgracia ahora no dispongo de mucho tiempo y no sé si podré subir más de dos looks para Halloween pero espero que os gusten de todas formas!

Hi there! Halloween is coming so today I'm showing you one of my looks for it. I don't know if I'll be able to do more than two Halloween looks since I have less free time now but I hope you likr these ones anyway!

En esta ocasión he optado por ahacer una bruja, pero  no una bruja guapa y sexy....más bien una bruja fea fea. Como véis la técnica que he usado es la misma que usé para el maquillaje de Samara de The Ring que hice el año pasado. Capas de látex estirando la piel para que luego se quede arrugada.

On this occasion I wanted to do a witch look, but not a sexy one....as you can see its a very ugly witch. The tecnique that I used this time its the same one I used last year for my Samara from The Ring makeup. Layering liquid latex on the stretched skin so then it stays creased afterwards.


Lo demás va a vuestra elección. Yo elegí un color grisáceo para la piel y ya como os de vuestra imaginación. Por ejemplo podéis añadirle pequeñas venitas alrededor de la cara para hacerla incluso más fea y hacer un controno muy marcado para parecer más fea y demacrada. La nariz y la barbillla las esculpí en un momentito con carne artificial que pegué a la cara y luego pasé una capa de látex por encima para poder maquillar la superficie sin problemas y la verruga la hice de nuevo con carne artificial y puse encima un set de pestañas individual para simular los pelos.

You can add as many things as you want. I chose a grey colour for the skin but you can use the one you want. You can also add little veins around the skin and the nose or add a very marked contour to make it even uglier. It's up to you! The nose and the chin I made them very quickly with nose and scar wax and attached them to my skin. I put liquid latex on top to be able to put make up over it and the big ward I did it again with wax and on top I added a single eyelashes set to make it look as if it had hair.

Estos son los productos utilizados para este look
Products used for this look


También podéis realizar un maquillaje de bruja usando solo Face paints como este que hice el año pasado pero que no llegué a subir al blog. La idea la saqué de Ana Arthur que siempre es una gran fuente de  inspiración para los looks de Halloween.

You can also make this makeup using facepaint, I did it last year but never posted it and I took the idea from my lovely Ana Arthur who is my always 'go to' for Halloween looks.


y esto es todo por hoy. Qué os ha parecido? A que estoy fea, feísima? Beso fuerte a todos!

And this is everything for today? What do you think? Did you like it? Take care, xx!

jueves, 9 de febrero de 2012

Elf/ Fairy LOOK

Hola a todos!!! Hoy os traigo un look muy rapidito y sencillo para carnaval. Se trata de un elfo/hada look. 
El look es el siguiente....

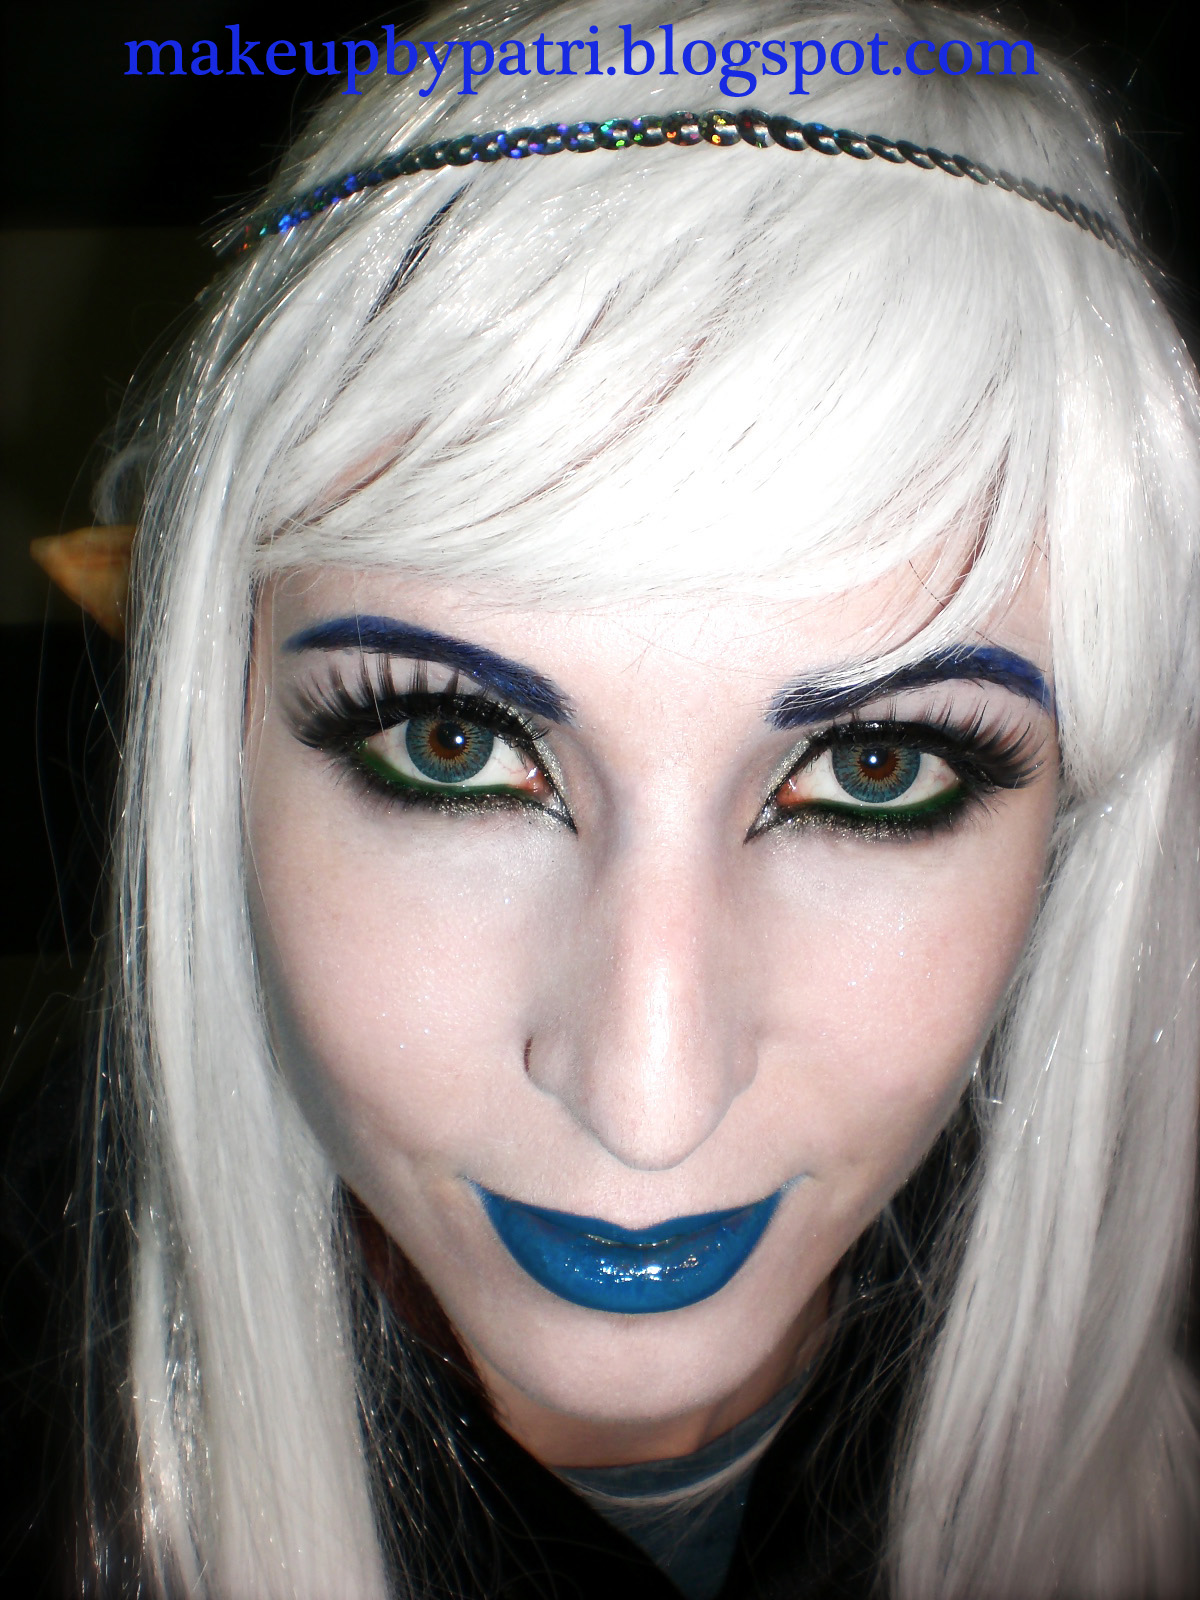
Hi everyone! Today I've done a very very simple and easy look for carnival. It's an elf/fairy look....


Como veis es muy sencillo, simplemente hay que palidecer la piel un poquito y elegir el color predominante. Yo elegí el azul porque quería utilizar el Pout Paint azul de Sleek para los labios y también quería probar el Super Shock eyeliner en azul de Avon para las cejas. 

As you can see it is super-easy. You just have to pale down the skin and choose a colour to be the main theme on the look. In this case I chose blue because I wanted to use Pieek A Boo pout paint by sleek on my lips and I also wanted to try the Avon Super Shock eyeliner in Blue on my eyebrows.

Las orejas las esculpí en arcilla y luego apliqué capas de látex y dejé secar. Después despegué el látex de la arcilla y metí un poco de algodón dentro para rellenarlas. Pensé en pintarlas más en un color más blanquito para que fuera con la cara pero como la peluca ya era blanca las dejé tal cual. Las pegué con más látex a mis orejas y ya está. 

I sculpted the el ears with clay and then I applied layers of liquid latex on top. i waited for it to dry and peeled it off. Then I put cotton on the inside and applied the ears with more liquid latex on my ears. I wanted to make them paler but I thought that with the wig so white they wouldn't stand out so i left them like this.

Espero que os guste aunque no es nada del otro mundo y es bastante sencillito. Últimamente no he tenido tiempo y veía que venían los carnavales y todavía no había hecho ningún look, así que hice este que es bastante fácil y rápido.

I hope you like this look although it is very easy and simple and also very quick to do. I haven¡t had time lately and the carnival are so close that I wanted to do at least one look for it. 

Los productos los dejo a continuación como siempre.

The list of products is down below as usual.

Muchas gracias por pasaros por aquí! xx

Thank you very much for reading, comment and follow! xx


Lista de productos/ List of Products


Skin/ Cara
White Supracolor by Kryolan
Blue eyeshadow form the 120 palette to contour my face
Inglot Body Sparkles in 51


Eyes/ Ojos
Urban Decay Primer Potion
Glamour Doll Eyes eyeshadow in Dirty Jeans
Kryolan Aquacolor in Black
Kiko eye pencil in 412
Makeup Forever Star powder
Fake eyelashes
Avon Supershock gel eyeliner in Shimmering Saphire


Lips/ Labios
Barry M kohl pencil in navy blue
Sleek Pout Paint in Peek A Boo 

domingo, 30 de octubre de 2011

Halloween Series: The Ring- Samara


Hola a todos de nuevo! Hoy os dejo con mi último look de Halloween y esta vez se trata de Samara de la película The Ring. Este look es muy fácil de hacer. Solo necesitáis algunas face paints, látex líquido y si no tenéis el pelo negro y largo pues una peluca. Por supuesto que lo de tener lentillas ayuda muchísimo. Bueno pues la técnica es muy sencilla. Se aplica una fina capa de látex con la cara estirada y cuando está seco se suelta la cara y así se queda el aspecto de piel vieja. Después tapamos las cejas, ya sea con pegamento en barra o con cera. Yo en este caso usé cera. Aplicamos una facepaint blanca por toda la cara y luego marcamos arrugas y suciedad con otros colores. Este paso se puede hacer tanto con facepaints como con sombra de ojos. Recordad que alrededor del ojo hay que delinear en rojo para hacerlo más impactante y por supuesto las arrugas del entrecejo y de la boca son las más importantes. Por último nos ponemos la peluca y le echamos gomina o espuma para hacer que parezca húmedo el pelo. Y ya está!. Como veis es muy fácil y rápido. Espero que os guste! y prometo hacer looks más 'normalitos' durante una temporada :). Adiole!


Hello there! This is my last Halloween look! Samara from The Ring. This is a sooo easy and simple look and it can look great and scary. you just need face paints, liquid latex, a wig (if needed) and the contact lenses are optional but they help a lot. First, we apply the latex with a stretched face, we wait for it to dry a few seconds and then we stop stretching the skin. This will give us like an old skin look. Then we cover the eyebrows either with glue stick or wax. I did it with wax here. After this we are ready to  apply a white facepaint all over the face and then we can make it look scarier adding a mix of various colours such as greens, blues, blacks and purples. For this step you can use either facepaints or eyeshadows but remember it is important to accentuate the red line around the eyes and the wrinkles around mouth and eyebrows since it is the most important feature of the look. Lastly, we put the wig on and try to make it wet with hair wax. And that's it! I hope you like as it is sooo simple and the result is really good! I will be doing more weareable looks for the next while :)! Happy Halloween! 


Haced click en las imágenes para verlas más grandes/ Click on the images to see them bigger!

domingo, 16 de octubre de 2011

Halloween series: Rotting Zombie

Hola de nuevo! Hoy os traigo una prueba que hice hace unos meses cuando estaba practicando el face painting y el maquillaje de efectos especiales. En un mismo look mezclé las dos técnicas y por supuesto probé en mi madre (jejeje) pobrecilla pero en fin, esto es lo que salió...

Hi there! Today I'm posting a look that I tried a few months ago when I was practising face painting and special effects make up and I decided to combined them both in a look. This is what I came up with and the model was my mum... (hahaha) poor her! But anyway, here is the look...


Los dientes los hice por separado con uñas postizas y látex líquido. Después los apliqué sobre los labios y alrededor puse cera. El resto de la cara está hecha con aquacolor de kryolan y las heridas de la frente con látex. Espero que os haya gustado y otro look de Halloween!
I did the teeth separately with fake nails and látex and then, I applied them over her lips and cover the edges with wax. The rest of the face I painted it with kryolan aquacolors and the wounds on her forehead are also made with liquid latex. I hope you liked it this new idea for Halloween!

miércoles, 28 de septiembre de 2011

Halloween series: Open wound

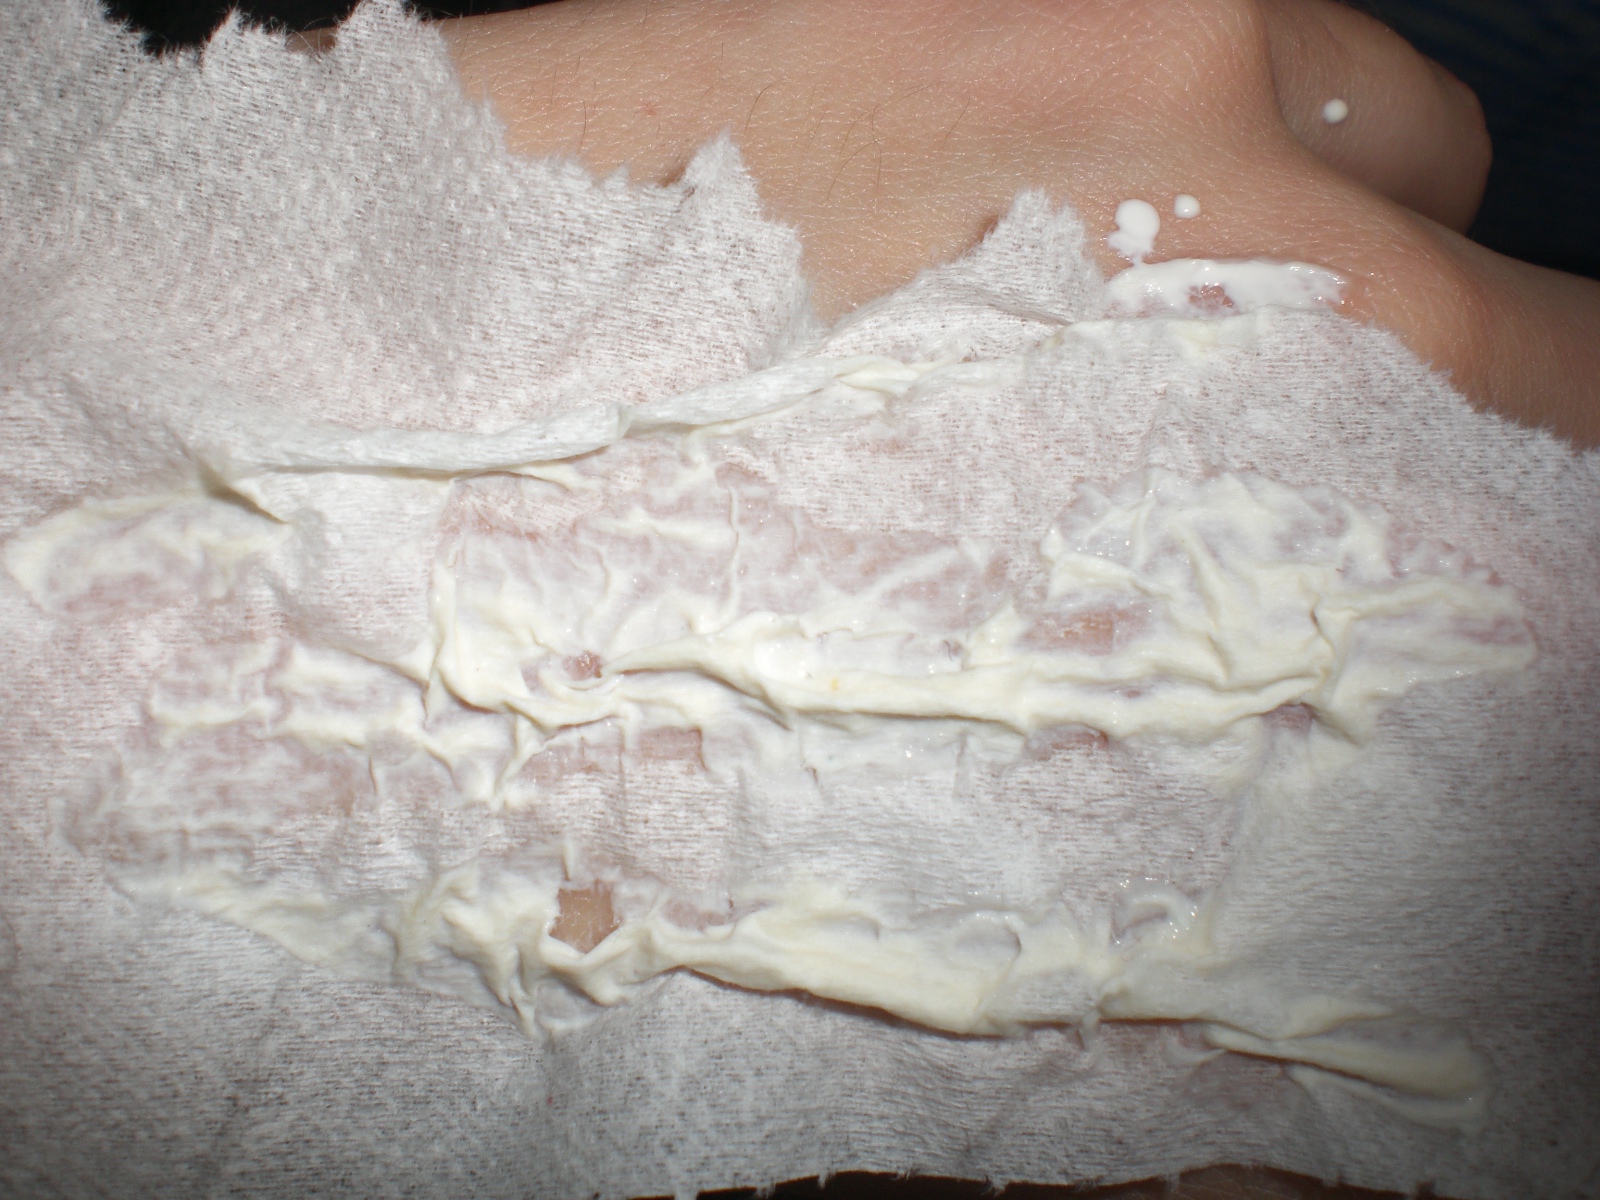
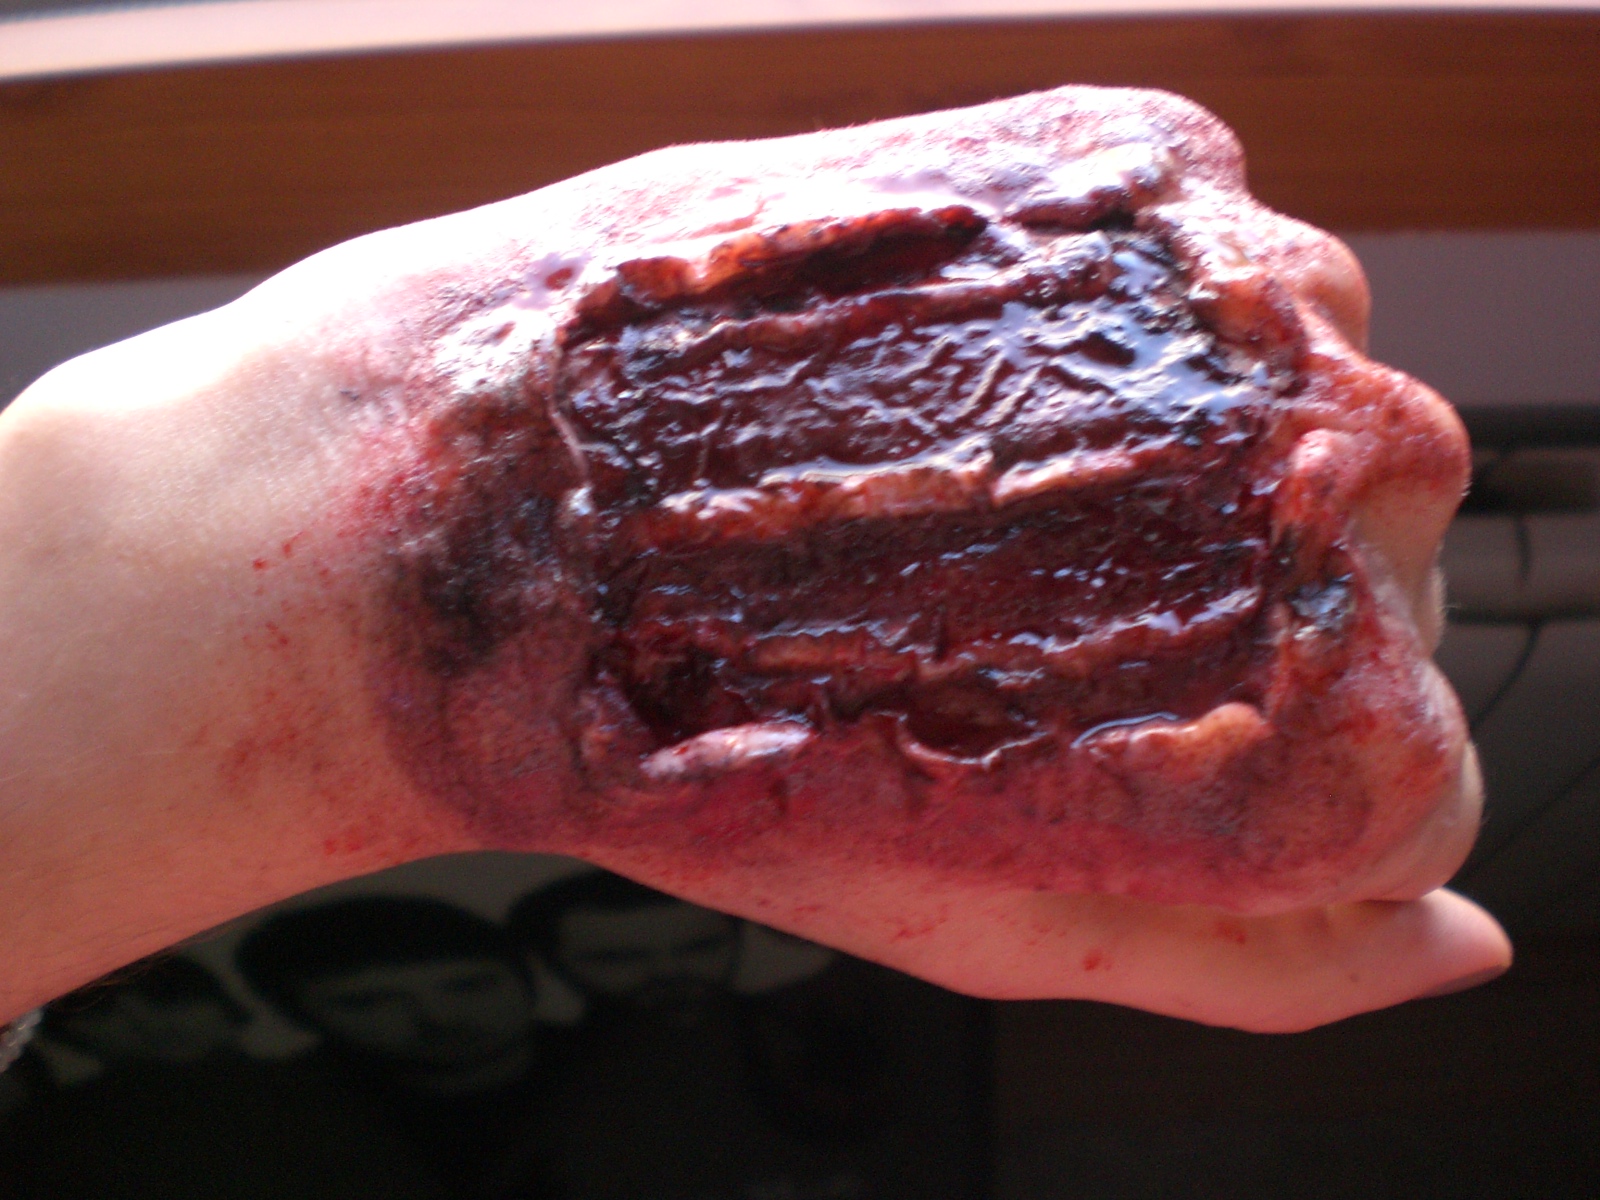
Hola a todos de nuevo! Hoy os traigo cómo hacer una herida en la mano para Halloween. Bueno, pues para empezar aplicamos el látex líquido en la zona en la que queremos la herida y colocamos tiras de papel higiénico. Con ayuda de una espátula le vamos dando forma para simular los tendones de la mano y a continuación aplicamos látex encima. Una vez que esto esté seco damos una capa de polvos para poder maquillar mejor el látex. A continuación cubrimos los bordes de la herida con cera y damos la forma que queramos a los bordes (recordad que si trabajáis la cera con las manos es conveniente que os apliquéis un poco de vaselina por los dedos antes para evitar que la cera se os quede pegada). Cuando ya tengamos los bordes como deseemos entonces es la hora de maquillar!. yo lo hice con mi paleta de supracolor de Kryolan mezclando negros, rojos, amarillos, etc. Después como toque final añadimos un poco de sangre artificial y la extendemos un poco por fuera de la herida tambien y ya está. Ya tenemos la herida. Espero que os guste y os sirva para Halloween! Adiole!

Hi everyone again! Today im going to show you how to do an open wound on your hand. Well, let's get started. Firstly, we apply liquid latex on the area we want. Then we put pieces of toilet paper on top and with an spatula we try to spread the latex underneath to make it look as the real tendons of our hand. Once we have that and it is completely dry we can set it with powder to make it easier whenever we have to paint it. Next we take wax and we apply around the edges of the wound sculpting then the way we want.  Now it's time for make up! I used my Kryolan Supracolor palette for this since it works easily for surfaces like latex. I used a mix of blacks, reds, yellows, etc. Lastly we can add some fake blood to make it look more disgusting and that's it! hope u like it and you find it somehow useful! Have fun!


LinkWithin

Related Posts Plugin for WordPress, Blogger...